Sunday, June 14, 2015

Louisburg -- Cangames 2015

I was looking forward to this game quite a bit. I had seen bits of the fortress under construction and heard reports about the games in Kingston but this would be my first chance to give it a try.

I ended up on the French side (I think mainly because that was the side of the table I ended up on) commanding the bastion on the shore side of the fort (I forget the name of it). Mike has posted his thoughts from the British side here
This shows the section of the wall that will be fought over looking from the sea side. There are 2 bastions connected by a long curtain wall with the town in behind. The british are in trenches at the foot of the scarp (I think that is the term) leading up to the moat. The gate and the bridge should have been at the end but they were overlooked in packing and so were AWOL for the battle (which is a shame as they are very good looking pieces).

Here is the view from the French side. Quite a bit of the French force is set up some distance from the ramparts.
Another view of the fortress giving a better look at the Governor's mansion

Two of the British players and the game master.
When we started the building of the town were removed to show the ruins left behind by the British shelling.


On the walls initially were some cannon and some infantry (but not enough infantry to hold the wall on their own).
The British assault began with the Rangers moving up into the moat towards the curtain wall

Other Rangers were advancing towards my bastion as well.

Some well timed musketry was enough to slow down the Rangers while the guns engaged in some counter-battery fire.

The Rangers fired back at the curtain wall but some nasty enfilade fire would be waiting for them as they moved into the moat!
Meanwhile the highlanders had moved on the undefended corner of the bastion and had scaled the ramparts!

The militia are moving into the attack (but defense of the town can't be allowed to interfere with other tasks like milking so the cow comes along for the attack).

Will they get there in time?
Meanwhile the centre of the bastion is also coming under attack.
The regulars are also rushing to help with the defense.
The militia and the regulars clash with the highlanders at the corner.

The tide seems to be turning with only on British stand on each corner of the fortress.

There are still lots of redcoats advancing to the wall (though the middle unit seems to have changed its mind about the whole attack thing).
The view from the British side.
The British attack on the other bastion.


The highlanders struggle to keep their foothold on the top of the wall in the face of determined attacks from the militia.

While the French commander is distract by political squabbling  (the playing card represents a random event indicating this) the British pop up on the centre of the wall again.
Finally the wall is clear again and the British slink back to their trenches defeated.

This turned out to be a very enjoyable game and the card activation gave some interesting moments as a long run of British cards helped them get onto the wall but then a run of French cards (combined with really good die rolls for the militia) drove them back off.


Saturday, June 13, 2015

Stop the Romans, the Battle for the Dyke at Cangames 2015

My computer is back in action so I now have to get through my backlog of Cangames reports.

First up is Stop the Romans

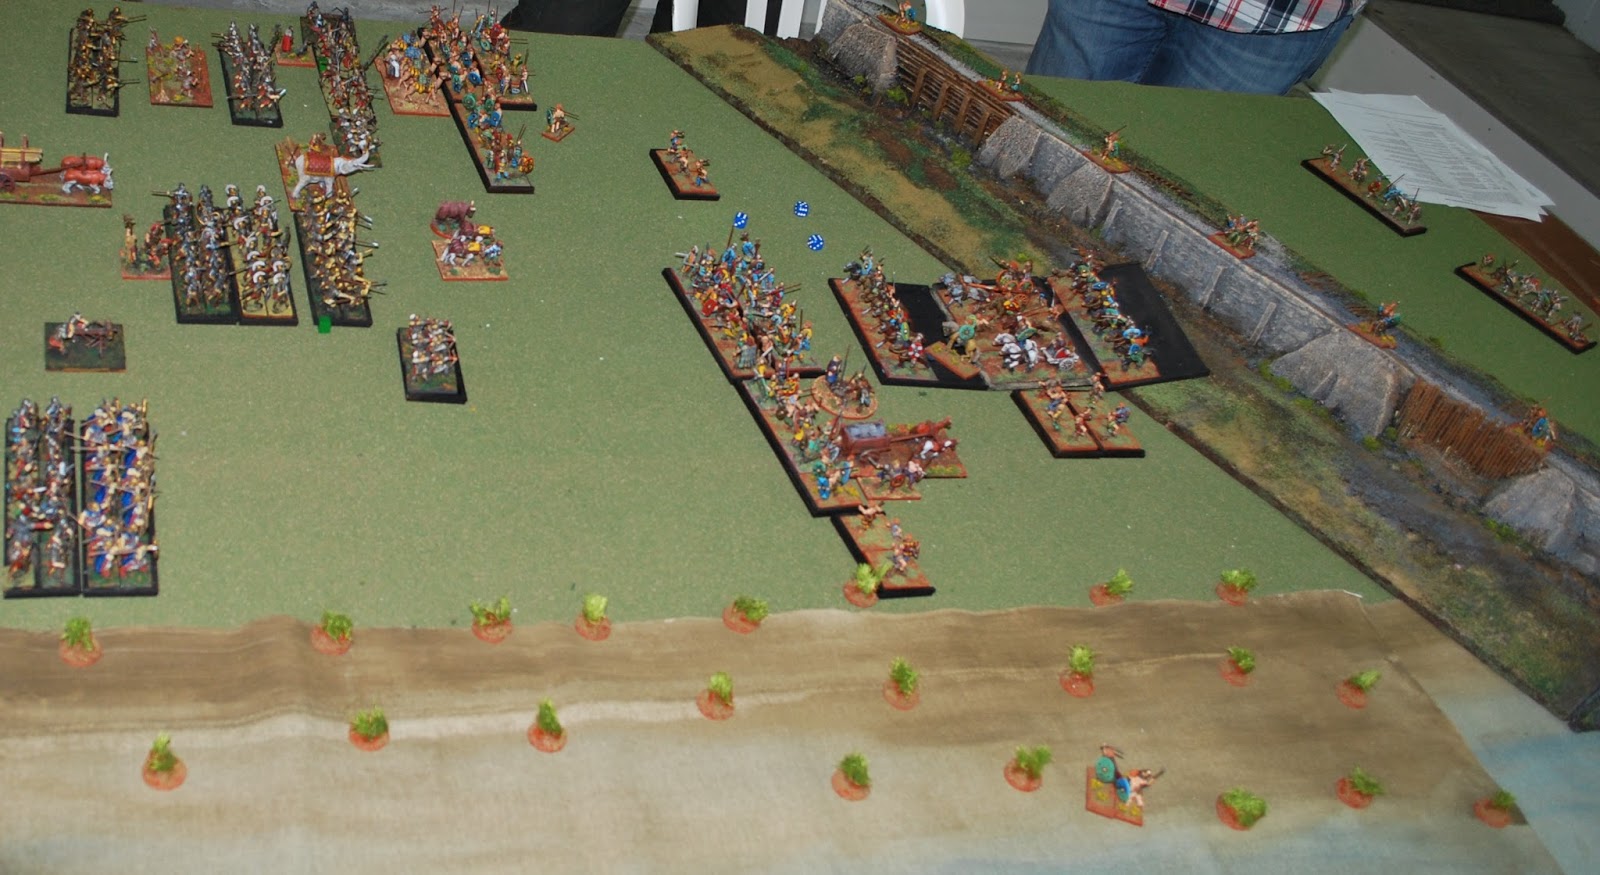
In this battle the Romans are rushing forward to try and seize a defensive dyke from the British before the bad weather sets in. The Roman forces are 3 divisions of mostly infantry with some engineers, light cavalry and archers. The British have 2 divisions of warband and sling and 1 division of cavalry and chariots as well as assorted light troops on the wall and a group of fanatic warband lurking behind the dyke.

The table at Cangames was quite a bit narrower than the one I used when I playtested it (as seen here). I did briefly think about getting another table but that would have made the table awkwardly wide so I had the dyke extend into the river and declared it as passable but bad going (and refused to answer any questions about the British chariots got across the dyke!)
The forces I used were the same as for the playtest -- I had hoped to add one more cavalry and one more warband to the British and one more legion to the Romans but the British reinforcements got lost on the way so I just left things as they were before. The British were set up further back from the table edge so that would be closer to the dyke if they chose to fall back to it.

The Romans could choose for each of their division to either not come on on turn 1 or to come on but have each unit roll individually for orders and to be ordered to move forward the maximum they could. All 3 Roman players choose to come on and the command rolls went pretty well for them.

The forces did get a bit mixed up like the archers charging ahead towards the British cart but most of the units came on the table.

 The British weren't quite so lucky with their rolls and one infantry division didn't move at all. The other did move up towards the Romans.

The Romans continued their march across the battlefield towards the dyke.

The British chariots charge into Roman Auxila

The battle is raging on the Roman left but on the right the British are mostly staying out of contact.

But finally, the Roman Marines fight the British warband.

 The Numidian Light Horse shows more bravery than common sense and attacks the British Cavalry
The light horse is easily driven off but the Legion are another matter altogether.

The victorious Romans resume their advance.

The Legion advances slowly to the dyke.
But due do a blunder in the command roll, the auxila advance much less cautiously and put themselves in front of the Legion
The Romans manage to get them selves sorted out and the Legion clambers up the fascine to the top of the dyke
The druid fanatics charge up the reverse slope of the dyke hoping to drive the Romans off.
The right wing of the Romans spend some time regrouping before they face the dyke.


The druid fanatics drive the romans off the dyke and charge down into the main Roman force

While on the other flank the Romans continue their more methodical advance.
After driving of the druid fanatics the romans go back up the fascine only to run into yet another druid fanatic.

But the Romans on the other side are now at the top of the dyke and there is no real opposition left on that side.

The game ended as a Roman victory but it was a hard fought battle and I think it could have gone either way.


Saturday, May 23, 2015

Lorraine Campaign Day 2

A few weeks ago (I am getting caught up on my battle reports) we had the second round of the Lorraine Campaign at the Ottawa Miniatures Gamers. I did not have the figures I wanted to use painted (though it does turn out that I do have more German infantry than I could find on the day) so I broke from my plan to only use lists from the Blood, Guts and Glory book and go for a German Heavy Tank list (or Schwere Panzer if you are that way inclined) because I had a King Tiger and some Tiger Is that I had painted up a few year back and had never used. My list consisted of a Tiger in the HQ platoon, a King Tiger in the first platoon, 2 Tigers in the 2nd platoon and a biggishy batter of armoured rocket artillery. I had hoped that the firestorm troops of one Grenadier, one Panzer Grenadier and fortifications would provide the bulk that this list was lacking. (I was not feeling confident, heavy tank lists are odd at the best of times and generally terrible in lower point value games)

As usual we had a pretty good turnout and lots of tables got set up

I was playing against evil Duncan who had a reasonably balanced (if somewhat tank-heavy due to the 2 armoured fiirestorms he had) US list. I don't remember the exact mission but I had delayed reserves. After much consideration I decided to put the infantry on the table and keep the tanks (except the HQ) in reserve.  I thought it possible that the infantry could hold for the 3 turns. I didn't put anything in Ambush as I was concerned that a rush up on the part of the Americans could keep me from appearing on the objective.

I set up with one infantry platoon on each objective and the HQ tiger hiding (I thought) behind the building. The Americans rushed forward en masse (my artillery was in reserve) and the tanks began to pound the infantry.


The US artillery ranged in on the Tiger on the first turn and it was bailed for the whole game (3 turns!) That was pretty much the game there as the infantry was killed. If I ha put my tanks on to start, I still would have lost but might have had more fun (not that it wasn't an enjoyable game but I didn't get to do much)

Since that game was rather quick we did play a second game with the free for all mission which was a bit more dynamic (but I still lost!)

--------------------
My laptop died as I was typing this in, I managed to finish it on my tablet but my Cangames reports will have to wait until I get it going again


Wednesday, May 20, 2015

Roll Call: PAVN

I should be sorting out my Cangames reports but my conversations with Ed and Stan left me curious about how many North Vietnamese troops I have both painted and unpainted.

It turns out I have the HQ unit with 3 HMGs, 2 AAMG units, a 6 tube mortar unit and 5 gun recoiless rifle battery (which should be 6 but one of them ended up being painted as Iraqi for a Force on Force game!) all painted and 2 Infantry Companies each with 2 platoons unpainted (but based). I am not really sure if there are enough to make an interesting Flames of War game (though I could add in lots of Tanks in Egyptian colours!) but it could be enough for Force on Force.

For some odd reason, I am feeling that I should paint the rest of these up (I recall the heavy weapons guys painted up quite quickly) -- Perhaps it is because I want a reason to buy the Brown Water Navy stuff and if these were done the chance that I would actually use them would be greater than 0!


Monday, May 18, 2015

Cangames Recap and the Big Brush

Cangames was this past weekend and I am posting my summary of how it went for me this year (as well as some pictures of Eds "Big Brush" 15mm tank technique). I will post more detailed AARs of all my games (as well as the most recent club game) in the next week or so.

This was the first year in quite a while that I managed to make it for the Friday. I played in Mike's Rus game and it was quite a lot of fun. The modified Lord of The Rings system makes for a good skirmish game without being to complicated. There wasn't too much else going on on Friday afternoon.

On Saturday I ran my Hail Caesar "Stop the Romans" game and it went very well. The game came down to wire with the Romans finally emerging victorious. In the afternoon I played in Ed's Louisburg game and it also was a lot of fun and came down to the wire (and was very good looking).

Sunday I ran Force on Force "Elements of Destruction". That was its usual blend of chaos and mayhem.

Overall I had a good time and it was nice to play some games, I think for the last 2 I have only run games and not played in them. The selection of games was good (but seemed to be really concentrated on Saturday) and they all looked good. There didn't seem to be much Fantasy and Sci-Fi this year.

The dealers area was not really all that exciting for me. I was looking to satisfy my completist bent for Descent but no one had anything for that and my painting queue is full up so I wasn't really looking to get any minis. The guys selling the laser cut stuff looked interesting (though I have forgotten their name!)

-----------------------------------

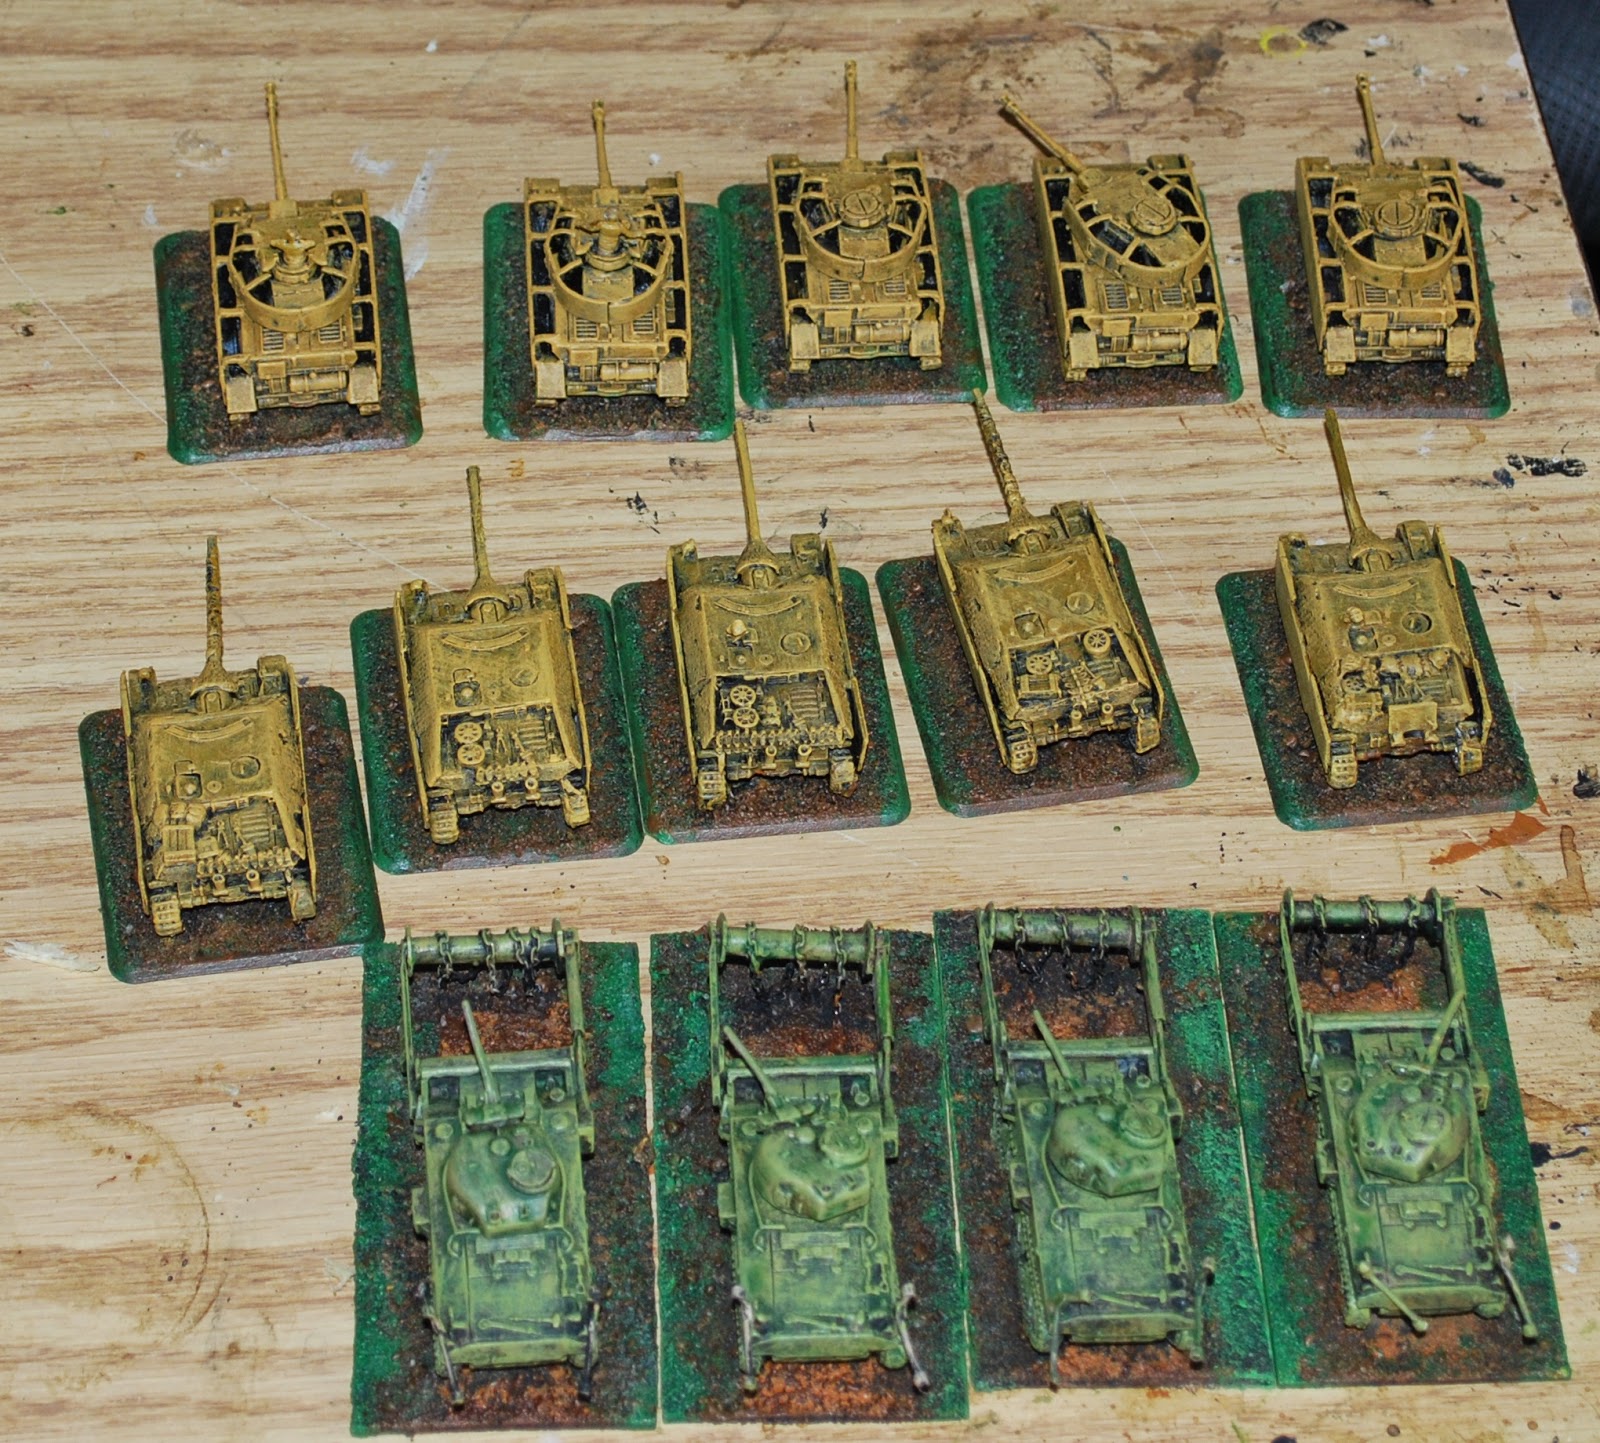
On Friday evening after the con, Ed demonstrated his "Big Brush" tank painting technique. This is basically taking a really big brush and painting and highlighting a base colour and then inking or washing. The results are very good for the effort involved.
 It only took a few minutes to get these 14 tanks to this level. The German tanks were painted the yellow-tan and then inked with yellow and the Sherman Crabs were painted brown and then inked green.

I used this technique for my Fate of a Nation tanks and was pleased with the results but it is hard (for me at least) to get the colour correct.

With some detail work these will be ready for the table in no time.


---------
Update: Here are the brushes that were used for this:


Tuesday, April 21, 2015

Lorraine Campaign Turn 1

This Sunday we played the first turn of the Firestorm: Lorraine campaign at the Ottawa Miniatures Gamers

I was defending a river crossing with a Panzergrenadier company consisting of  3 Platoons of infantry (one of which was a firestorm unit), 1 platoon of Panthers, 1 platoon of STuGs, 1 platoon of Marder IIIs, 1 platoon of PaK 40 AT guns and a fortified strongpoint. Francis, my opponent, had a US Tank Company with 2 platoons of Jumbos and Sherman 76s, an armored infantry platoon, a pioneer platoon, a mortar platoon and a 155mm artillery platoon

We rolled for hold the line which meant I had to keep half my platoons in delayed reserve but I got to have 2 in Ambush.

I put 1 infantry platoon in the fortified position on the left and I kept the Panthers and AT guns for ambush. I was tempted to have the infantry in ambush to protect the other objective on the farm but the AT guns would be close to useless if they had to move onto the table (and not using the Panthers doesn't really seem like an option at all!)
The tanks moved towards the fortified position and the infantry moved up the other side. I was expecting a rush to the side with no one on the table but the Americans were quite cautious so I delayed placing my ambush.

The US infantry moved up to the river and the tanks were trying to take out the MG nests in the fortified position so continued to be patient (not my usual mode of playing) and kept my ambushing units off the table

The tanks took out one nest and the artillery was pinning the infantry in the trenches but not getting any kills. On my turn 3 I got the first of my delayed reserves (the STuGs) and decided to Ambush the Shermans with the Panthers.

One platoon of Shermans was wiped out in the ambush.

The US artillery counter-attacked and took out one Panther (I think he managed to hit 3 of them but I made and armour save on 1 and Francis rolled a 1 on his firepower for the other)

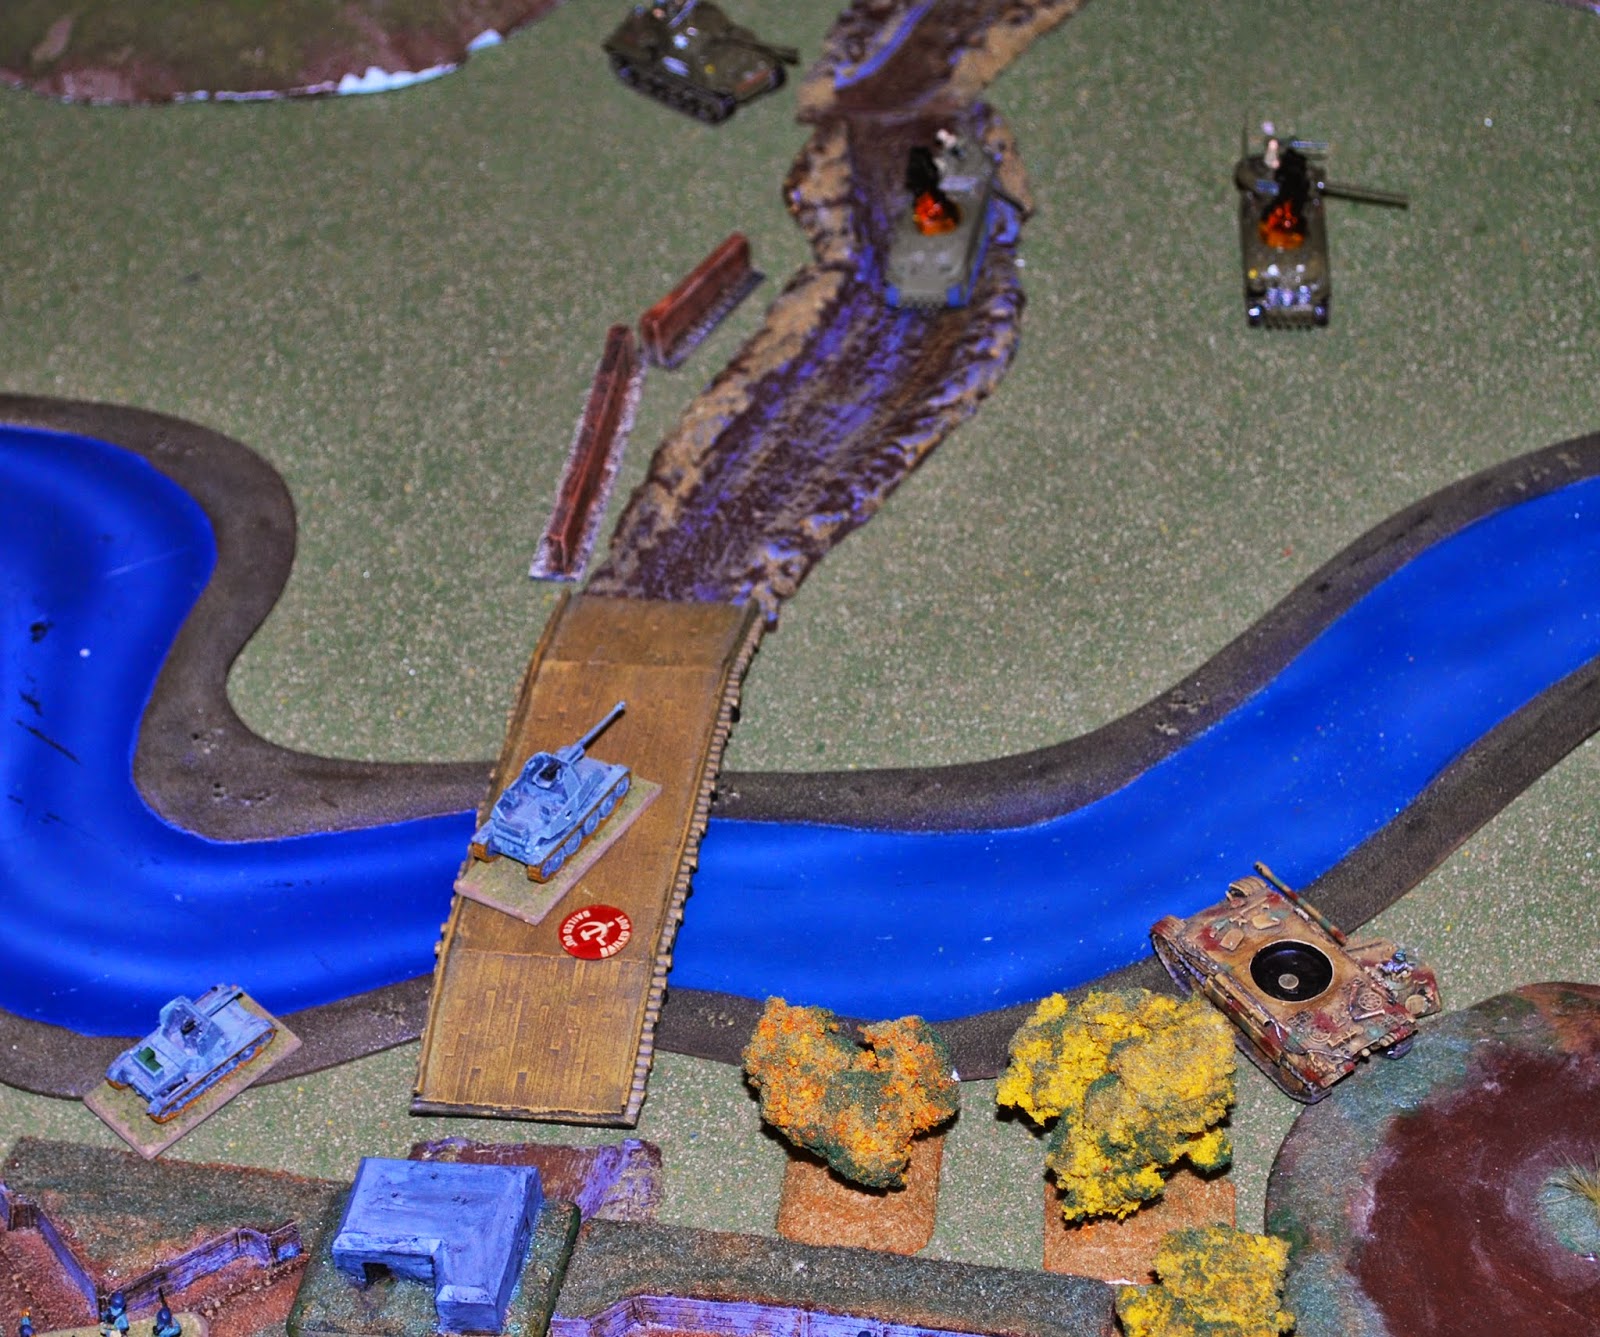
This was my turn of mistakes (fortunately not fatal ones). I spread the Panthers out on the river bank when I should have gone across the bridge to force the Shermans to turn and face them so the AT guns and Marders could get side shots on them and I moved the STuGs close enough to the US infantry that they could be assaulted.
Lots of smoke this turn, the Panthers were smoked to force them to move and the STuGs were smoked to aid in assaulting them. Fortunately the assualt failed (I don't remember exactly what happened)


The next turn the Panthers did cross the bridge and the Marders managed to take out the two remain 76mm Shermans
The Company Command Jumbo somehow managed to only bail one of the Marders (though since I was Reluctant, he remained bailed for the rest of the game)

The 2 remaining Panthers ran between the building to hide from the artillery (the US mortars had nowhere to hide from the Panthers though...)

The US infantry was now facing the German Infantry that had moved up into the farm, the Panthers that were moving up to the ford, the STuGs on their flank and the remaining Marder on their other flank.
The US artillery struck again taking out 2 STuGs.
The game ended with the US infantry wiped out and a 6-1 German victory.

It was a very enjoyable game, I think it would have been hard for the US to win with the river there but if they had been more aggressive in the first 3 turns they would have had a reasonable chance.

I would like to get the PzIVs and PzIV/70s finished for the next game to give me a bit more choice for the next list but I also want to get a unit of Roman Legionnaires done and my 28mm Germans