Monday, December 31, 2018

Saga Terrain Frenzy

For the early part of the new year I had a plan to slowly build up a collection of terrain to match the Universal Terrain Table from the new SAGA book of battles.


As it turned out both Meredith and I were feeling rather sick so we decided to postpone our trip to Kitchener to visit some friends so I decided to get a start on the project. I had some Woodland Scenic trees and decided I would go with foamcore bases. I had always been a bit reluctant to use foamcore because it is not the most durable but I realized that foamcore was good enough and was within my ability / available tools to actually do something with it.

I cut foamcore into the appropriate square for all the non-hill pieces (they would be made from styrofoam) and started carving the foamcore for the forests.
The bases for the trees were glued down (I had thought of using magnets but again decided that the theme for this terrain build was just to get it done, I would just glue them -- There is enough space to put figures around the trees without too much trouble and if it does prove to be a pain in play I can build another set of woods sometime in the next decade!)
I used latex housepaint (the blue is from a D-DAY beach piece I did quite a while ago) to bind some sand to the base to add some texture

The peices were primed and painted with some brown and green to have some background colour. I was happy / surprised with the progress I was making so I made two marsh pieces as well which were brought up to the same stage.
Next some flock / static grass was added to bases -- the very green flock was added around the ponds in the marsh before I poured in the resin water.
The water has been poured into the marsh and the trees put on the forest bases -- I have also started the field pieces, I made furrows in drywall patching compound which seemed to work well.
Some highlighting on the fields and the marshes are flocked  (and the two last pieces of foamcore waiting to be carved)
 The flock is added to the fields and finished on the marshes.
The last 4 pieces (hill, rocky hill, rocky ground and ruins) have been assembled and sand added. Hopefully I will get them primed before the end of the Christmas holiday. Even if I don't get further, I have made much more progress than I expected and our next SAGA will have a lot more terrain choice.


Saturday, October 13, 2018

Sarrisa Motel Part 2 and a Little bit of Saga

Carrying on from the earlier parts of the hotel construction (the construction and painting ), this week I received the replacement parts for the acrylic stair pieces I broke. (I also got a swimming pool and playground set that I will use for some ground decoration around the motel).

Here are the pieces with the spray paint finished and a first coat on the exterior doors and all the concrete painted with one coat.
I think the next steps are to paint the window and door frames as well as the vents on the side and add some rust weathering to those and then was with a grime wash and see how it looks at that point. I painted a dark blue on the roof to break up the black and I will do a grey dry brush and might put some flock on the roof to show the level of dis-repair

I don't really have a sense of what I want to do with the office -- I will do the doors and window frames in steel with some rust and maybe that will be enough?

The stairs in MDF went together much better than with the acrylic sides.

It turned out that the acrylic railings had the same problem as the stairs -- they were too thick and wouldn't fit in the slots. Fortunately the mdf frame that Sarisa sent had the railings in MDF and they fit fine


-------------------
Also this weekend Mike and I played a game of Saga. He has posted a more detailed battle report but I thought I would give my thoughts here and also some thoughts on where I am going with Saga (which with the Walking Dead is the game I am  most active with at the moment).

While on holiday in Cape Breton this summer I painted up some plastic Vikings that I have had for a while and then decided that this should be a Norse Gael army so I ordered a unit of Hearthguard and one of Warriors armed with Dane Axes. I also got a Warlord with a Dane Axe and Gripping Beast were good enough to add in a figure of Brodir of Man, Who Steel Cannot Bite, Sorcerer and King-Slayer.

A month or so ago Mike and I played a game where I played with a regular warlord and Mike posted a battle report. I felt the Pagan Rus had some abilities that did have a strong impact on the Norse Gael board but I really enjoyed the army. I think it may have been the first time I played with an army with no mounted units!

I decided to play then again this time with Brodir of Man. I had to proxy a bit since he is only allowed to take units of Black Crew (hearthguard with 2-handed axes) and I don't have 5 units of Dane Axe armed vikings!  The game went well (even though I lost!), i might have been a bit too aggressive and Brodir was bitten by steel and was not a particularly good sorcerer and didn't kill any kings. I am now tempted to get and paint up some Black Crew but I think I will hold back on that until I get some other stuff painted.

In the near term, I want to finish painting my Spanish and Franks. The spanish only need 2 units of warriors to be finished (and they are about half done) along with the Warlord. The Franks need a bit more -- my goal is to field Roland so I need 4 points of foot and 4 points of mounted and I think I have one of each painted (Roland is painted though, as is a mounted Warlord)

Mike wants to do some Roman Saga -- I am still not sure about using my Early Imperial Romans but I will give it a go at some point.

Wednesday, September 12, 2018

Sarrisa Motel Part 1

So work has actually begun (the preliminary post can be found here ):

I painted the tops of the roof pieces of the main wings with house paint I had used on some other projects and then sprinkled on some sand. I have also laid out the acrylic parts to remind myself how they go together (and managed to break one of the stair cross-pieces in the process! I think I should be able to put the good one in the slot away from the stairs and the stair step will act as enough of a spacer.

I  made some colour choices as well but then I had to make some changes as there was a limited selection of paints (or at least paint I was willing to buy there were more colours in some more expensive ranges)

I primed all the non-stair components


And then masked off to paint the bathrooms and sprayed them -- I decided to do the first attempt on only one floor so I could learn from the experience for the others

Next the bathroom was masked so I could paint the floor.

Then the floor gets maksed to paint the walls (there was a lot of overspray through the windows but I didn't think that mattered -- for the others I might spray the whole balcony just to get a start on the concrete)


And finally I mask out the whole interior and then paint the outside


I still need to paint the concrete balcony and then add weathering and paint the doors and windows. There were a few places where the paint leaked either through the mask or through joins in the wood but I don't think they are critical especially as the hotel is supposed to be run-down.

I am happy with the results and it really wasn't a lot of work but it take some time and space (and required the weather to cooperate since I was spraying outside). I will now spray the 3 remaining room pieces and the office -- and I guess I can start on weathering and detailing this one while I do that.


Friday, September 7, 2018

Sarrisa Motel Planning


After playing the Walking Dead on the Labour Day long weekend, I decided that I need to paint up some more of my Sarrisa buildings. The grocery store is really cool but it is just too big for some games as its footprint is pretty much the same as one of the Mantic 20”x20” maps.


There is probably some planning that will need to go into this and what better way to do that than to post on my blog for the first time in a year and a bit!


In hindsight, it might have been better to spray paint some of the pieces before assembly but I think a lot can still be done with spray paint and some simple masking (at least I hope it is simple, I have never done anything like that)


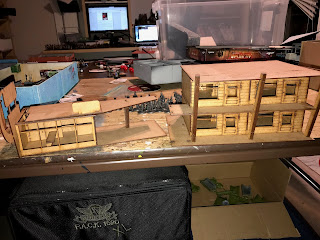
Here is the motel -- I haven’t assembled any of the parts that have acrylic pieces since I don’t want to paint over them. One of the buildings was put together back to front (it still surprises my that it is possible since Sarrisa sells the left and right wings are different kits) -- this is annoying but doesn’t really have any aesthetic or game issues.


For the two wings my plan of attack is to put some filler on the ground to give a bit of texture and some sand on the roof and then spray prime black. For colour I am thinking a pale yellow exterior, cream coloured interior walls and red-brown carpets. I am not sure yet if I want to paint the balconies and support as wood or concrete.


For the reception building, I plan to have the same colour scheme and with any luck I will have my 3D printer running again and can print some signage.


The clear acrylic balcony and stair railings I plan to distress a bit with some sandpaper and give them a grimy wash


Hopefully I will have a bit of an update in the next week or so